Bitalino Demo
- Overview
- Download Links
- User Manual
- Documentation
Bitalino Unity3D Demo Package
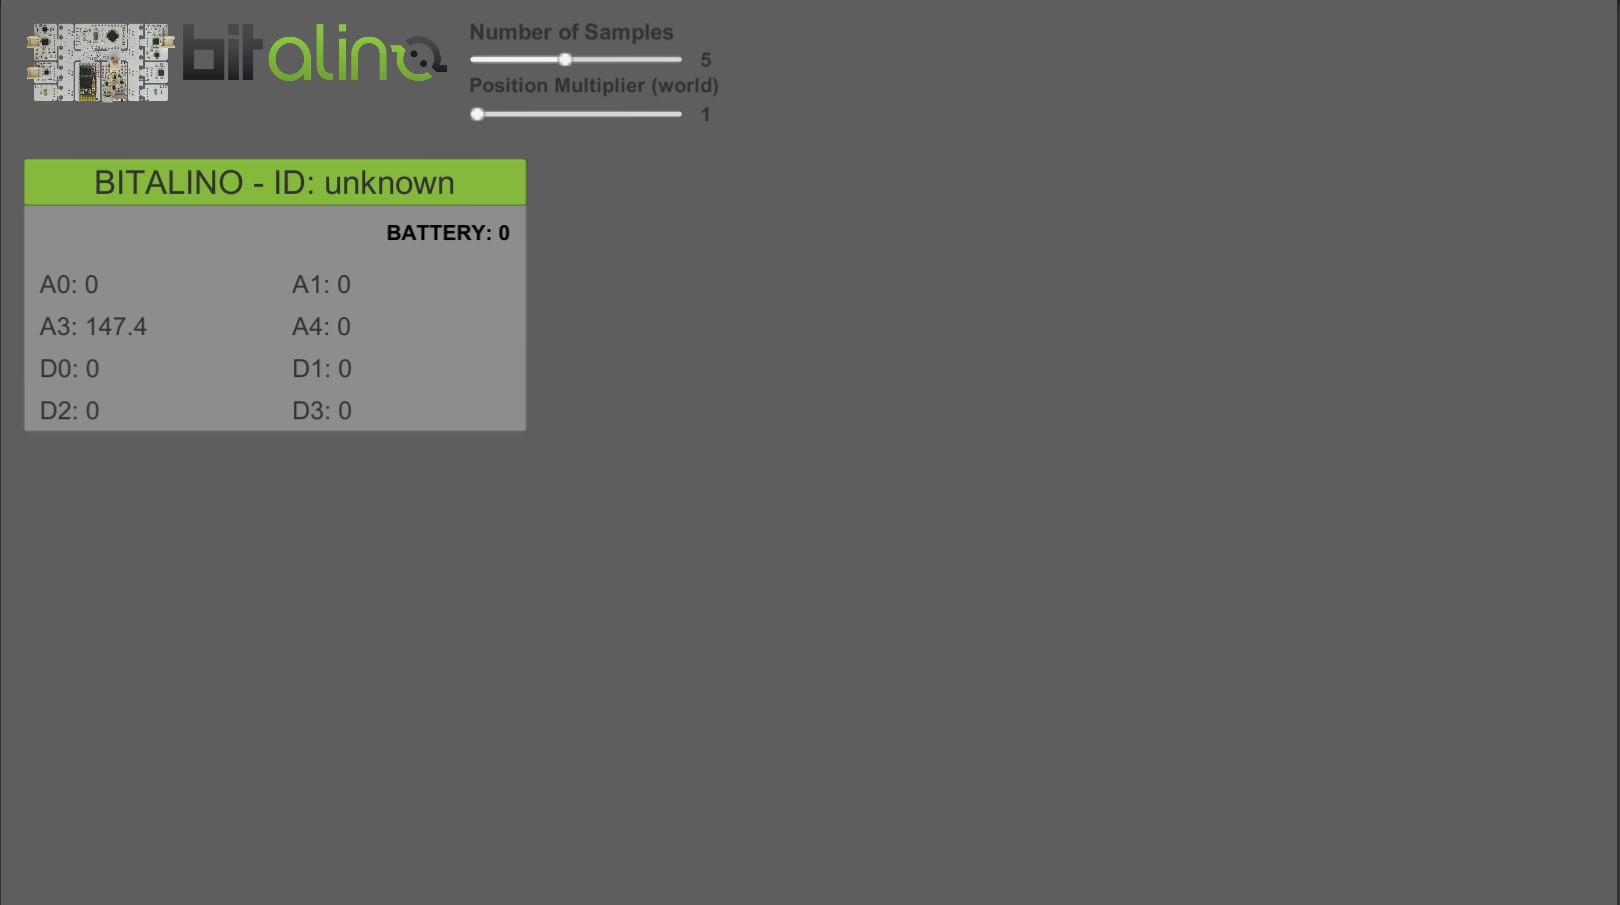
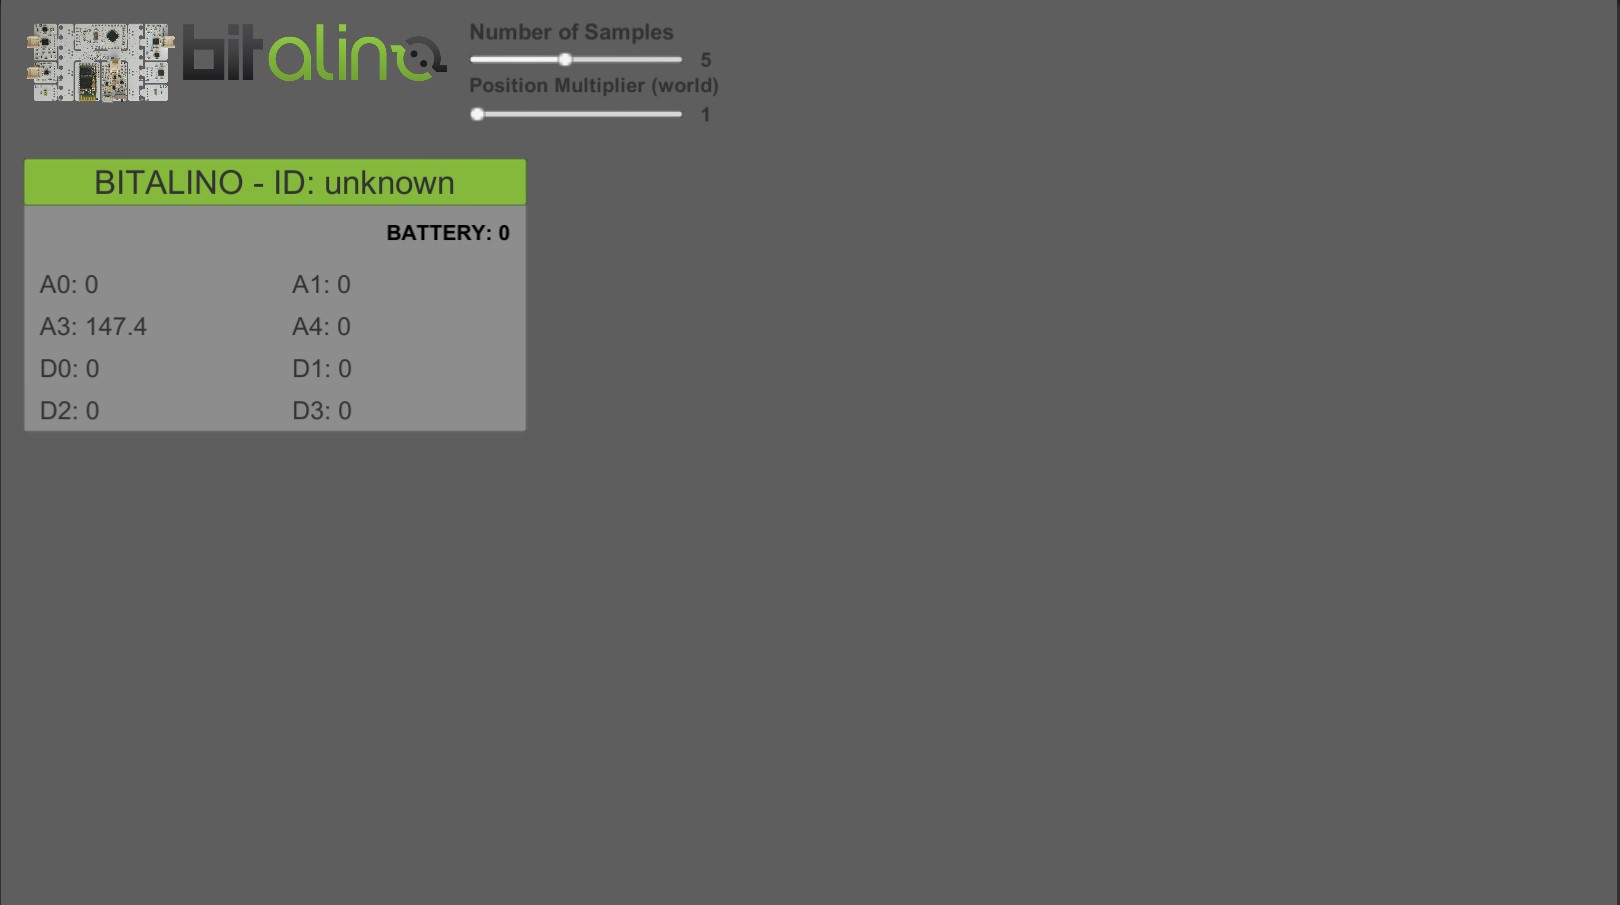
The bitalino Demo package is a package to be used in Unity3D. This demo allows you to fully integrate your bitalino with unity3D as long as you use the Reh@panel protocol to send its information. There is already a tool (BITalino client) that sends the bitalino information using this protocol.
Developed by: Tatiana Vieira, Yuri Almeida
Here you can download all the tools you will need to reproduce our demo with your own bitalino.
Requirements to use the package
- Plug in your bitalino to the PC (bluetooth pair)
- Make sure that it is sending information by UDP to port 1202 (To change this port check our User Manual section).
- You can use the bitalino client to do this – Download Link here
- Run the Unity3D scene
Download Links
Latest Stable Version:
Latest Stable Version (build):
- Demos Launcher_01_2018 (you don’t need Unity3D to run this example)
Importing the package
- Create a new project
- Import the package bitalinoDemo.unitypackage
- Assets -> Import package -> Custom Package
Requirements to use the package
- Plug in your bitalino to the PC (bluetooth pair)
- Make sure that it is sending information by UDP to port 1202 (To change this port see below).
- You can use the bitalino client to do this – Download Link
Testing the scene
- Open the Scene
- Neurehab -> Demo Bitalino-> Scenes -> BitalinoDemo
- Make sure you fulfill all the requirements
- Press Play
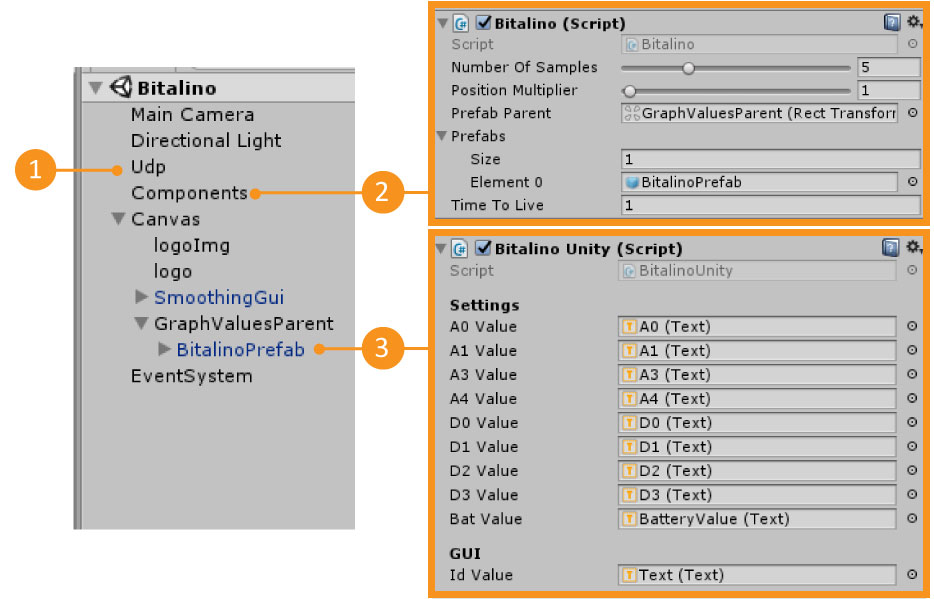
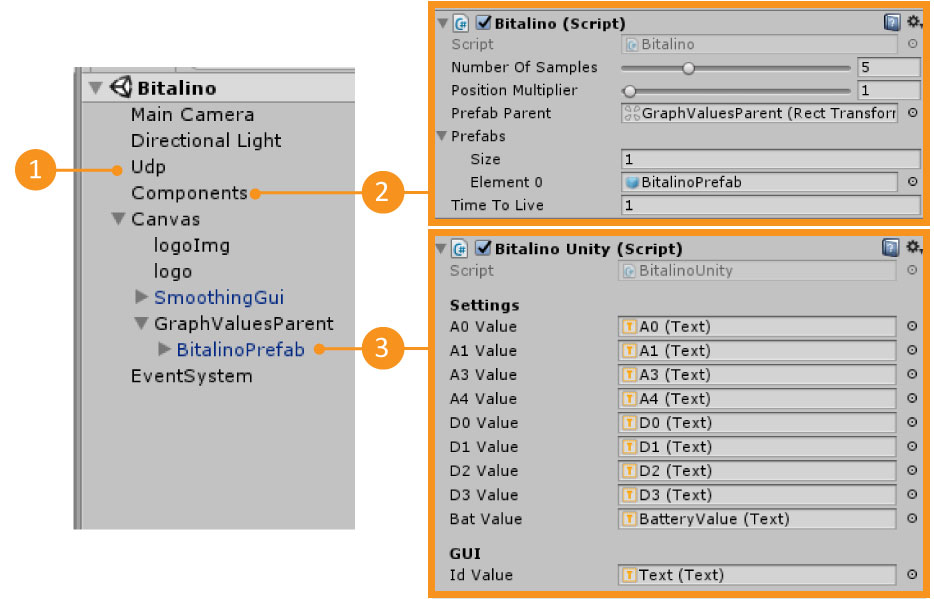
| 1 – UDP | Gameobject that has the UDP connection Information. You can change the UDP port here |
| 2 – Components | Gameobject that has the Bitalino.cs script |
| 3 – Bitalino Prefab | Prefab that has the BitalinoUnity.cs script. This prefab will only appear in the scene when you have pressed Play |
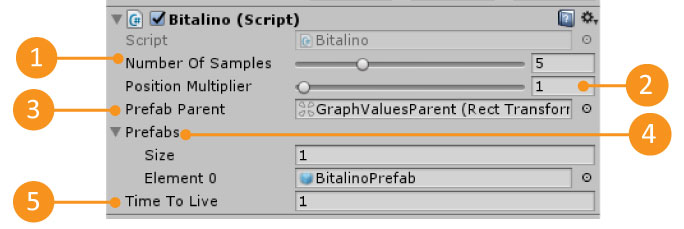
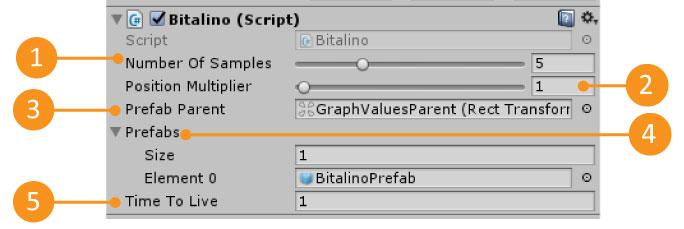
| 1 – Number Of Samples | The number of data samples to save for each data input. In the end returns the average of that data input. |
| 2 – Position Multiplier | Multiplies the position that is receiving for this value. This is useful when you have a game world scale that differs from the real world. |
| 3 – Prefab parent | The Gameobject parent where the device prefabs are going to be instantiated. Each instantiated prefab represents a Bitalino that is sending data by UDP. |
| 4 – Prefabs | The list of prefabs that can be instantiated. |
| 5 – Time to Live | The maximum time in seconds that a prefab can wait for new data before it is destroyed. |

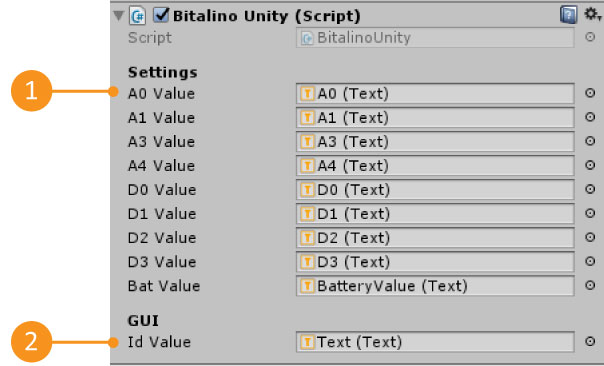
| 1 – Available Data | All the data that we are receiving from a bitalino. |
| 2 – Device Id | The bitalino identifier. Each device has its own ID. |
The data is accessed through the BitalinoUnity.cs script. If you open this script, in the UpdateGuiValues function you will notice that the bitalino prefab values are updated there.
private void UpdateGuiValues()
{
A0Value.text = Neurorehab.Scripts.Enums.Bitalino.a0.ToString().ToUpper() + ": " +
GenericDeviceData.GetFloat(Neurorehab.Scripts.Enums.Bitalino.a0.ToString());
...
}
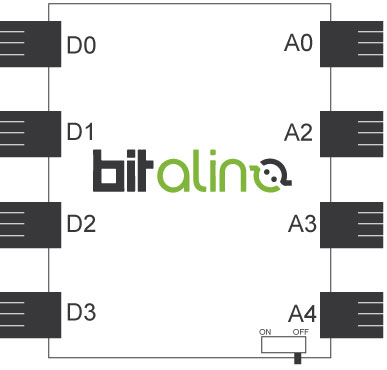
To be able to access any data that the bitalino is sending, you will need to know two things: the label of the information you want to access and the type of that information. Then, using the BitalinoUnity.cs script, you can find all this information by accessing the GenericDeviceData Dictionaries as shown below:
GenericDeviceData.Get[INFORMATION_TYPE](“[INFORMATION_LABEL]”);
GenericDeviceData.GetFloat(“battery”)
Current Bitalino protocol values
| Information Label [INFORMATION_LABEL] | Information Type [INFORMATION_TYPE] |
| a0 | Value (float) |
| a1 | Value (float) |
| a3 | Value (float) |
| a4 | Value (float) |
| d0 | Value (float) |
| a1 | Value (float) |
| a2 | Value (float) |
| a3 | Value (float) |
| battery | Value (float) |


