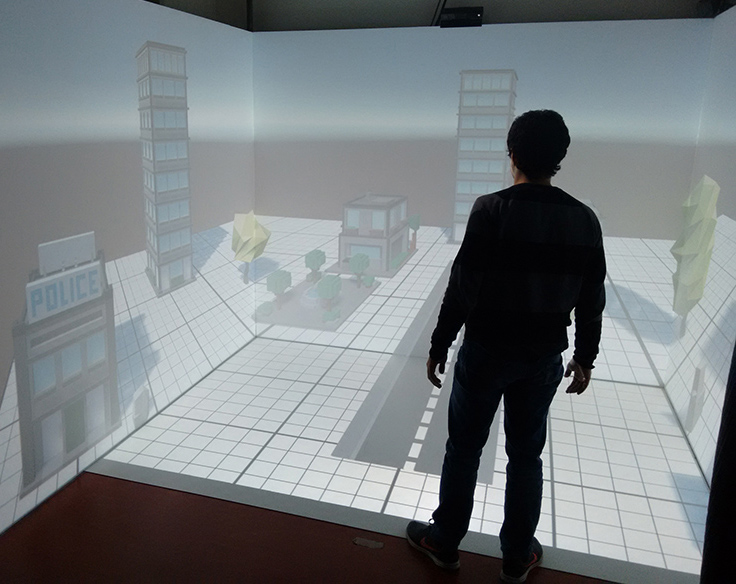
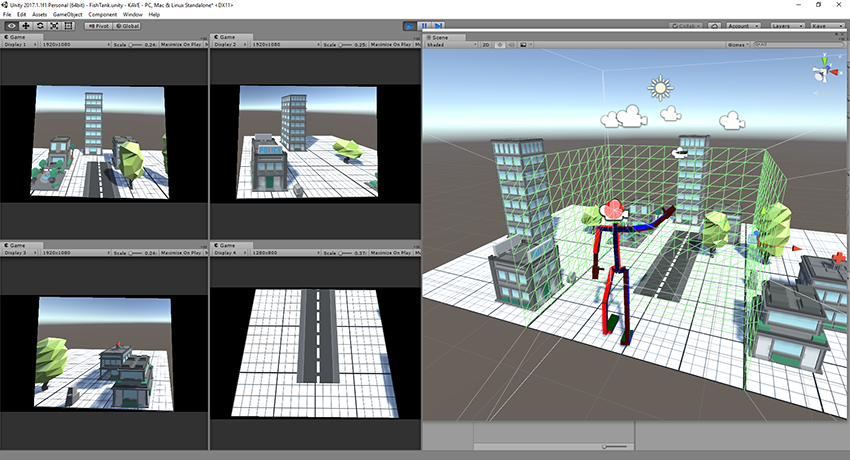
The KAVE is a Unity plugin that:
- Adds parallax effect to Unity projects through Kinect v2 head tracking
- Supports up to 8 screens/projectors in any physical configuration (normal desktop screen, CAVE, etc…)
- Features full skeleton tracking for interaction with virtual objects
The plugin requires a calibration file with the position, orientation and size of the screens, projectors, projection surfaces and Kinect sensor. For this you can use our calibration software.
Developed by: Afonso Gonçalves
Here you can download our latest version of the KAVE package and our calibration software.
Requirements to use the package
- Kinect v2:
- A Unity 2017 project
- A calibration file
Download Links
- KAVE plugin (download here)
- Calibration Software Build (download here)
License
If you use or adapt this software in your research please consult the author at afonso.goncalves@m-iti.org on how to cite it.
Copyright (C) 2017 Afonso Gonçalves
This program is free software: you can redistribute it and/or modify it under the terms of the GNU General Public License as published by the Free Software Foundation, either version 3 of the License, or any later version.
This program is distributed in the hope that it will be useful, but WITHOUT ANY WARRANTY; without even the implied warranty of MERCHANTABILITY or FITNESS FOR A PARTICULAR PURPOSE. See the GNU General Public License for more details.
You should have received a copy of the GNU General Public License along with this program. If not, see http://www.gnu.org/licenses/
Using the Calibrator
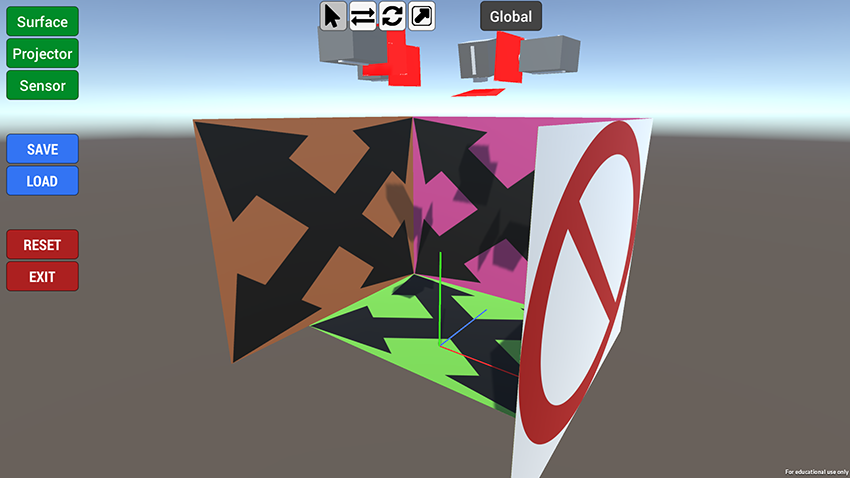
- Controls Mid-click: Pan camera ALT + Mid-Click: Orbit camera Spacebar: Select objects W: Translate objects E: Rotate objects R: Scale objects X: Change transform space (Global or Local)When an object is selected, the gizmos with selected tool is shown.
- Adding objects Unlimited surfaces, unlimited projectors and only one sensor is able to be in the scene simultaneosly. Deleting objects is not allowed, but you can restart the scene with the Reset button in the left of the main view.
- Save and Load file The configuration file is located in “../KaveCalibrator_Data/calibration.xml” if you want to load an existing file, you should move the file to the specified path with the name “calibration.xml”. If you have started a new scene, the saved file will be in the same location.
- Press “Surface” to add one
- Select it
- Adjust its Position, Rotation and Scale to match your projection screen position orientation and size precisely (in meters). You can use the edit boxes or the toolbar to manipulate it
- Go back to step 1 until you have all your room projection surfaces represented
- Press “Projector” to add one
- Select it
- Adjust its Position and Rotation to roughly match your projector
- Press “ON/OFF Camera”
- If the projection is not being displayed on the desired display press “CLOSE VIEW” and change the target display of the projector on its slider to the desired display, you can use the “ON/OFF Camera” to check
- Once the projector is active on the correct display, press the corresponding number on the keyboard (1 to 8), and use the black circle as mouse cursor to drag the green circles to the corners of your projection surfaces in the real world. The red polygon should completely cover your projection surface. Interaction needs to be done with the black circle as mouse cursor as Unity mouse position is limited for multidisplay
- Press “Close View”
- Select the surface that is the target of that projector and also change its display to the same target number as the projector
- Go back to step 1 until you have all your projectors have been calibrated
- Press “Sensor”
- Change the its Display to the same as the projector that is projecting on the floor
- Have someone stand over the projection floor
- Adjust the Position x and y, and orientation y of the sensor until the feet represented on the projection are directly below the person’s feet